Biyernes, Marso 3, 2017

I had accumulated three floor standing fans which had stopped rotating. Had cleaned and oiled its shaft bearings and even changed the squarish capacitor but still not turning. Was about to throw them away when I thought "... what's the harm in dissecting them, I could learn something from it...!!"
I had asked a few servicemen and all I got was a short "...there's an internal thermal fuse...". I trawled the web for months but just could not find any info on where the fuse was and how to replace it. Finally I decided to sacrifice one of the fans and dissected all the wires going into the windings.
From this came the schematics of the fan, but only up to the motor windings.
This instructable comes in 2 parts: (I)Troubleshooting and (II)Fuse replacement.
Step 1: Materials Required

Cross head screw driver
Flat tip screw driver
Scissors or Pen knife
Soldering Iron and some Solder
Some string about 0.5mm in diameter
Spare wire, about 60cm long
Capacitor 1.4uF 450VAC (if required)
Thermal Fuse 130degree C, 1A, 250Vac
(note: I could only find a 2A 130deg replacement @$1.50SGD a piece from the local electronic component shops. Sorry I don't have equivalent part number from Mouser, RS n Digikey)
Step 2: Troubleshooting

WARNING:
If you are NOT trained in electrical repair, please STOP here.
It would be wise to spend the money for a replacement fan and give the faulty one to someone who knows. We are dealing with 250VAC, so be extra careful. You proceed at your own risks.
The Schematics :
At this juncture, I assume you know and have verified that the timer and speed selector are working fine (i.e. voltages are present at output of the speed selector (grey, orange and red wires)), see schematics and picture.
The colors of the wiring used in my fan may be different from yours, so make a note.
Troubleshooting the Thermal Fuse :
1. Disconnect power to the fan.
2. Open up the control unit cover.
3. Take your time to trace the wiring and note down its color and location. It should be similar to the schematics above.
4. Using the spare wire, connect from point “A” to “B” to shunt the fuse. For my case, “A” was the blue “neutral” wire on the terminal block and “B”, the grey wire on the big squarish capacitor.
Once done, make sure your fan (without the blades of course) is resting properly and securely as we are going to power it up.
5. Connect and power up the fan motor. If the fuse is faulty, the motor will rotate, mine did. If it did not, it might also be that point “C” was used instead of “B”, since you could not know which terminal it was. No worry.
6. Disconnect power. Move point “C” to “B” and power up the fan again. If it still would not rotate, it’s likely the capacitor.
7. Disconnect power and remove the spare wire.
Replacing the Capacitor:
1. Disconnect power.
2. De-solder (or cut) the wires at capacitor terminals and connect them to a new capacitor (same type).
3. Power up the fan. If the motor still refuses to rotate then I believe the problem is with the motor windings and it's time to say bye-bye to the fan.
Step 3: Thermal Fuse Replacement

Once the thermal fuse has been determined to be the cause, here we go...
Removing the Thermal Fuse:
Disconnect power to the fan before proceeding.
1. To make fuse replacement easier, we need to free the motor from the control unit keeping its wiring harness as long as possible. The harness has 5 wires going into the motor housing. By tracing this harness, starting from the motor housing, I found the Ground (green/yellow) and Neutral (blue) wires ending at a terminal block and another three (grey, orange, red) ending at the speed selector.
2. Remove the Ground and Neutral wire (no cutting required) from the terminal block. De-solder the grey, orange and red wires at the speed selector, note their location first. (You may have noticed that I cut the whole harness about 10cm from the motor…big mistake...but that was way before I decided to do this!!)
3. Using a flat tip screw driver as a lever, pry the motor housing mount rod away from the control unit.
4. Remove the oscillating unit and detach the capacitor.
5. Remove the metal housing screws. Carefully remove the rotor and the windings slowly by giving it enough slack from the harness.
6. The windings are tied by strings and coated with some kind of lacquer. We need to cut some of them (see the “X” points in the picture) using pen-knife or sharp tip scissors. Look for a bulge (where the fuse is) and notice where it ends.
7. Carefully slice open the black sheath cover to expose the brown woven sheaths, also tied with strings.
8. Trace the blue Neutral wire from the harness towards the windings. You will notice it ended inside the biggest sheath which is on top. This is our target. Cut the strings tying this sheath.
9. This big sheath, which is flattened, holds the fuse and another sheathed wire. Use fingers to lift it and press on its sides to form back its tubular shape.
10. With wriggle, press and pull action, slowly remove this sheath and the thermal fuse will be exposed. Put the removed sheath aside to be reused later.
11. Notice that one of the fuse’s leads is also sheathed to prevent electrical contact. Slice the SIDE of this sheath lengthwise about 10mm. Expose the lead through this cut.
12. With both leads exposed, cut them off as close to the fuse as possible. This will give us enough room to solder the new fuse.
13. Trim the leads of the new fuse to about 10mm and tin them with solder.
14. Solder the new fuse, polarity is not important but you may follow the old fuse direction.
15. Move the cut sleeve to cover back the lead exposed in step #11above.
16. Cover the fuse and its accompanying wire with the big sheath removed in step #10 above.
17. String the new fuse assembly to the windings as neat as you can. Fold back the black cover and string again. Ensure no string or black cover sheath is protruding into the rotor area.
18. Carefully place back the windings and rotor into the motor housing.
19. Secure the housing and mount back the oscillator and the capacitor.
20. Insert the motor housing mount rod to the control unit, a little pressure is needed here.
21. Dress back the wiring harness and reconnect the Ground and Neutral wires to the terminal block. (For me, I had to solder back all the wires and insulate them with heat shrinking tubes. I also had to de-activate the oscillator to prevent them from rubbing against each other)
23. Re-solder the grey, orange and red wires back to the speed selector.
24. Power on the fan to test. Cover back the control unit and you are done.
Step 4: Finally...
I did not use lacquer to protect the windings and its been operating for nearly 2 months now at around 6 hours a day.
To prevent overheating, I modified the timer to disable the permanent "ON" selection. By using the timing mechanism there will be resting time in between, when no one is in the room or no intention to use the fan for a while.
FLAT IRON TROUBLESHOOTING GUIDES


 | |||||||
| WHAT IS FLAT IRON??? Electric Flat iron is an important domestic appliance. We use iron to press clothes. Ironing removes wrinkles in fabric and it requires heat. When the fabric is heated, it becomes soft and mobile and then by applying pressure it can be given preferred orientation which is retained when the fabric is cool. Electric flat irons operate with 220 volt AC and are available with usual power rating between 450 watt and 2.0 kilowatt. The common working temperature is around 100*C and safety devices are provided in some models to prevent temperature rise beyond 200*C or 250*C. Small irons of power rating as low as 300 watts are also available. Now a days numerous models from various manufacturers are available. Modern electric irons have attractive features like beautiful look, light weight; multiple adjustable temperature levels to suit different fabrics, non stick coated sole plate, thermal fuse for safety etc.
History and Development Of FLAT IRON:
Metal pans filled with hot coals were used for smoothing fabrics in China in the 1st century BC. From the 17th century, sadirons or sad irons (from an old word meaning solid) began to be used. They were thick slabs of cast iron, delta-shaped and with a handle, heated in a fire. These were also called flat irons. A later design consisted of an iron box which could be filled with hot coals, which had to be periodically aerated by attaching a bellows. In Kerala in India, burning coconut shells were used instead of charcoal, as they have a similar heating capacity. This method is still in use as a backup device, since power outages are frequent. Other box irons had heated metal inserts instead of hot coals.
https://en.wikipedia.org/wiki/Clothes_iron
TROUBLESHOOTING PROCESS OF AN ELECTRIC FLAT IRON
Electric Iron Repair http://www.doityourself.com/stry/how-to-repair-your-iron
Yes, people do still iron. This Fix-It Guide on electric iron repair tells how an electric iron works, what often goes wrong, how to identify an electric iron problem, and what parts and tools you will need to fix it. It then gives simple step-by-step instructions for how to clean an iron, how to service an iron steam and spray mechanism, and how to clean a metal soleplate. This Fix-It Guide also refers to electrical cord repair and appliance control repair for more information on specific repairs.
How Does an Electric Iron Work?
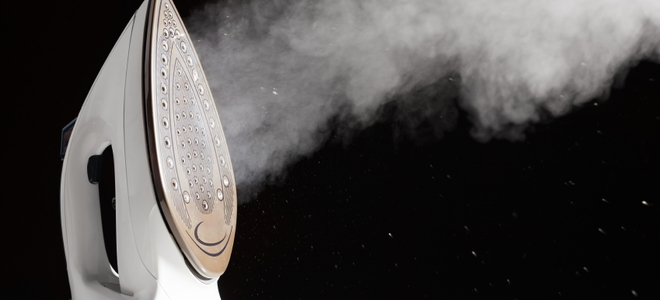
Whether it’s a basic no-frills iron, a cordless model, a compact travel iron, or an electronic iron loaded with features, all steam irons work in the same way. They press out wrinkles in fabric using moisture, pressure, and heat. When the steam valve is closed, the iron operates dry. When the steam valve is open, water drips into a heated steam chamber, where it exits as steam through vents in the soleplate. The iron’s working surface, the soleplate, may be plain metal or coated with an easy-to-clean nonstick material.
What Can Go Wrong with an Electric Iron?
Fortunately, there is very little inside a well-made iron that can go wrong. Most repairs are for faulty cords, damaged handles, and mineral deposits that hamper steam irons. Problems with an iron’s electronic complements should be dealt with by an authorized service center. It typically is more cost effective to replace rather than repair an iron with internal problems. Check the owner’s manual for your iron to learn the manufacturer’s suggestions for cleaning, what water to use, and storage tips.
How Can I Identify an Electric Iron Problem?
As with many small appliances, regular maintenance makes a dramatic difference in how trouble free your electric iron will be. Even so, things can happen.
What Do I Need for Electric Iron Repair?
Larger hardware stores may have replacement parts for popular brand electric irons. Also, you can get them from the manufacturer or an aftermarket supplier. Maintenance and repair tools you’ll need to fix an electric iron include these:
What Are the Steps to Electric Iron Repair?Clean an electric iron:
Service an electric iron steam and spray mechanism:
Clean an electric iron metal soleplate:
OTHER TROUBLESHOOTING GUIDE FOR FLAT IRON:
An iron is a small appliance used to straighten out wrinkled clothes and kill any microbial activity occurring inside the clothing. Very little repairs are usually needed for a well-made iron, but sometimes you will need to fix broken handles, faulty cords, and clogged holes where steam is released. You can easily repair problems by following the steps described below.
Step 1 - Identify the Problem
It's important to know what sort of problem exists and what is required to repair it before starting. Read the manual provided with your iron first to be sure there is nothing wrong with your settings. Next, check the thermostat and electric cord if the iron does not heat or heats up exceedingly high when the power is switched on. If steam is not coming out properly or the water is being spat out when the iron is on, check the bottom of the iron (sole plate) and holes from where steam is released for debris or obstructions. Last but not least, check the sole plate surface if the clothes are clinging to it to see if there is any residue or debris burned onto it.
Step 2 - Take Appropriate Precautions
Switch off or disconnect the iron and leave it to cool off completely. If you start repairing the iron while it is still plugged to the circuit, you might get an electric shock.
Step 3 - Replace the Power Cord and Thermostat
Before you get into replacing the power cord, make sure you can find a new one for your particular appliance. Try local appliance repair shops, online sellers, or take it into a hardware or appliance store to see if there is perhaps a universal cord that will work.
Remove the cover panel first using an appropriate screwdriver. There will often be another set of screws just inside, securing the cord in place, and you'll need to remove these as well. Then, remove the wire nuts connecting the power cord to the wiring inside the iron and set it aside. Connect the new one in the exact same way as the old and screw it back into place. This is also the best time to replace the thermostat if it too is having problems.
Finally, screw the cover panel back into place, and switch the iron back on to check that it is heating properly.
Step 4 - Clean the Sole Plate
Anything that is stuck to the sole plate can cause problems with the function of your iron, so it's important that this piece is cleaned whenever it's stained or dirty. For stains, dampen a cloth, put salt on it, and rub the bottom of the iron, or simply use a nylon pad with water and soap. If the blemish is stubborn, some toothpaste can be rubbed on with a soft cloth. When the sole plate gets buildup on it from ironing starched clothing, use white vinegar to remove it. You can also mix an equal amount of vinegar and salt and use it on the sole plate after heating the solution. Do not employ wire gauze pads, abrasive pads, or even abrasive cleaners, as these may scratch the non-stick coating on the iron and damage it permanently.
Step 5 - Remove Burn Marks
Cover the whole iron with paper except the bottom. Then, take the iron out into an open air space so the oven cleaner fumes do not spread inside the house. Directly sprinkle oven cleaner on the sole plate. Leave it for three minutes before you wash and rinse with cold water. Remove the paper when you're finished.
Step 6 - Clean the Water Container and Steam Holes
Fill the reservoir about a quarter full with white vinegar, and then empty it by steaming the iron. The vinegar fumes will open the holes that were earlier clogged by mineral deposits. Continue repeating this process until the holes are totally devoid of deposits.
To clean the container itself, fill it with distilled water and wash it thoroughly, making sure no vinegar remains in the reservoir or the holes.
|


Mag-subscribe sa:
Mga Post (Atom)